Tag Archives: pillow

Share the Love – Middle Sister Studios

When I saw Middle Sister Studios display at a craft show I had to walk back, a few times. I really love her stuff. I didn’t really have a little kid to buy for but I love her creations and envied her fabrics.

She’s got the whole super cute woodland animal thing down. These stuffies are so sweet. And her dolls are amazing too.

She’s reachable on her Facebook page.

Double Rainbow


‘So Intense’ by sewtara

I’ve sold a strange amount of my double rainbow pillows lately. I figured a rainbow treasury was in order.

$64.00

$1.50

$9.90

$60.00

$25.00

$6.50

$9.50

$3.75

$35.00

$15.00

$125.00

$25.00

$18.00

$46.00

$15.00

$24.00

Treasury tool by Red Row Studio.

Triple Double Rainbow pillows!

Apparently my double rainbow pillow has been making some rounds on facebook!  Now it’s like domninoes, my etsy store is getting some link love.  I’m getting emails asking me to make more.  As I list them they’re selling!  It’s crazy!

Thanks Facebook, as if you didn’t already steal enough of my time guess what I have to do all weekend!  :)

Double Rainbow geekery and a shop update.

I’ve got waaaaay too many ideas right now for the amount of hours that are in a day! I can’t keep up. But I’m trying really, really hard.
Of course that means staying up silly late after the kids are in bed to finish things. Last night I managed to tidy up the ends of a few projects and today I actually accomplished listing them in my store even! I feel like I done good. Here’s some of the things I listed.

My double rainbow pillow.

Little Red tea bag holder/cozy

Very Cherry clutch

Tea Time tea bag holder/cozy

Hoping to get another idea or two out of my head tonight!

Valentine craftiness! Conversation heart pillow tutorial.

Finally I finished my Valentine inspired quote pillow!  Once again putting me crafting late at night when I probably should be heading off to bed.  Instead I will make the world a better place and tell you how I made it in case you’d like to brighten your space with this cute little throw pillow.  Not only is it a pillow it’s a cute little message for my family since my husband or kids are welcome to follow the instructions anytime they like!

Sooooo first you need some hearts.  I cut 4 hearts out of pink, red and brown felt.  I just used the trick of folding the felt in half and cutting half a heart.  You could get fancy and use Google images to find a heart template to trace if you’re afraid to free hand it.  Then I embroidered the sayings onto the hearts with different colours, pink on red, fuchsia on pink, cream on brown.  I was sort of basing the sayings on a little thing my dad and me used to say so I needed 4.  You could have more of less hearts, bigger or smaller ones,  just depends on what you want on your pillow.  But you can still follow this horizontal stripe idea even if you change it up a bit.

Gather some heart/love themed fabric (part of why it’s taken me so long to complete this project) and fuss about which ones to use and how (another reason it took so long).

I decided to use the Timeless Treasures fabric again since this pillow will go on my bed with my “Sew in Love” and “Oh” pillows.  Wow, I can’t believe I have 3 decorative pillows on my bed . . . and they have names . . . ok, back to the turorial . . .

Pin the conversation hearts onto the backing fabric you want and get a feel for the placement.  I cut a piece for the back from brown fabric and decided on 20 x 13.  Think about how big you want your pillow and cut backing for that size.  Because I was going with a length of 20 inches I trimmed the swirly heart fabric to 20 inches and then just cut under the conversation hearts where I thought seemed nice and even with the top.  Then I added a band of brown to the top, bottom and the red swirly Timeless Treasures.

Once again, I was very scientific – I just added fabric until it was the same size as the back, trimmed it down so they matched and carried on.  The 2 pieces were basically 20 x 12.  There was some loss in the trimming.  So add horizontal stripes of fabric until your front is the same size as the back.  I had 4 stripes in total, yours is up to you.  I had gotten some piping for along the perimeter of the pillow to jazz it up a bit.  I wanted it to be different from the other 2 on the bed so I went with the piping and rectangular shape.

I was going to hand sew the hearts onto the backing fabric using contrasting colours but in the end I decided to have the stitching be nearly invisible.  So there I was changing my thread and bobbin a few times to get the right coloured thread, but it was worth it in the end.

I have never used piping before and the lady at the fabric store suggested sewing the piping to one side before putting the right sides together.  I followed her advice but I’m not sure it made things any easier.  It was finicky work and since you can’t really see how close to the piping the stitching is I found it annoying.  I stitched it to the front piece first thinking that would make a nicer edge on that side.

Lay the backing on with right sides together and stitch around leaving an opening for turning and stuffing of course.   Trim the corners so you’ll have a nice crisp edge when you turn it rightside out.  I turned the pillow, pushed out the corners with my trusting stuffing tool (aka chopstick), use what you’ve got.  Then stuff your pillow through the opening.  Once it has reached it’s desired fluffiness you’re ready to sew it closed.  I did this part by hand just to make sure the front was kept nice and clean looking.  The backing only has to be stitched to the piping part, I was a bit picky about mine but I wanted to keep the stitches virtually invisible so I probably fussed more than I needed too.

Quote pillow project, complete with soppy story.

Finished my Style School pillow assignment today.  I was kid free for a bit and was able to get some crafting done, and some laundry!

I used some of my Timeless Treasures fabric, finally.  I’ve had a little plastic bag of fat quarters sitting around and decided to use one up.  I almost put the owl fabric on the back but decided to just use a plain brown fabric to match our duvet.  I sewed the doily onto the fabric around the outside and near the middle.  Then I embroidered the words curving around it.

Here and there the letters dip down and are stitched through the doily.  I figured it would help hold it down and I liked the un-perfectness of it. The words are from a Dave Matthews song, “Oh“. I embroidered them in a dark plum colour, the photos don’t really capture it as nicely as it looks in person. The line is from the chorus, “I love you oh so well like a kid loves candy and fresh snow”.

I also added a bit of a finish to the edge just to make it a little bit fancier and different than my “Sew in love” pillow since they’re both going on our bed.

Soppy story alert!
When I met my husband we lived about 2 hours away from each other. He burned me some music CDs, Dave Matthews being one of them. We met in March and spent every weekend together for about 3 months, then he got the news he had to move for his job, putting us about 4 hours away from each other. I distinctly remember sitting on the creaky fire escape like steps up to his little apartment on a warm night, staring at the stars and listening to Dave Matthews while I , ever the worrier, asked over and over “what are we going to do?” A month later I was with him in his new apartment while I looked for my own. I never got one. 6 months later we were engaged. Here we are now, coming up on married for 5 years. We danced to “Oh” at our wedding and it’s a cute soppy song.  Every time I hear it I smile and my heart gets all warm and fuzzy.

Handkerchief pillow tutorial. Complete with cute embroidery!

My friend gave me a few handkerchiefs her Grandmother had lying around figuring I could make something with them.  I had the idea to make them into little throw pillows for my bed.  I was going to make her one and give it to her, but I’ve already given her a pillow I made so I figured I’d be keeping it.  Then I realized one of the prints would be perfect for embroidering a little something right in the middle.

Perhaps a heart with our names in it?  So I cut out a heart and was just about to trace it when I remembered the awesomeness I had just ordered from Peptogirl!

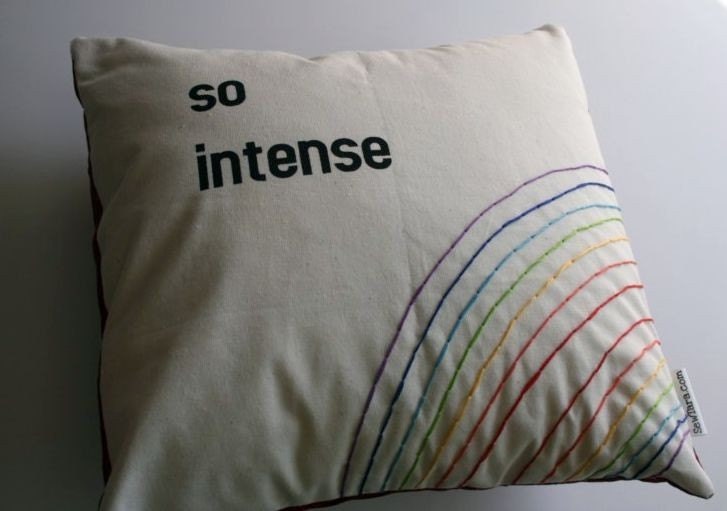
I flipped through the patterns and found one I liked and I took the liberty of making a slight adjustment.

Here’s how I made the pillow:

First I cut a piece of plain unbleached cotton fabric a little bit larger than the hanky. Then I ironed the two pieces so they’d be nice and flat. In hindsight I should have cut the cotton a bit bigger, I ended up losing the border when I squared it up before putting the backing on.

Next, in a very high tech. transferring process, I freehandedly copied the ‘sew in love’ pattern onto the hanky, adding my own little touch.

Then it was onto embroidering before a repeat ironing performance. I just put the hanky and fabric in a hoop together and stitched my design. When I took it out the stitching was through both layers holding it together.

So off to my machine I went where I stiched around the edge of the hanky, I went on top of the hem stitching with the same colour so it wouldn’t show.

While doing that I hit a pin!! Never in all my time sewing have I actually hit the pin. CLUNK! went the machine, and I totally expected the pin to have snapped and tried to pull it out, but nope! It was just bent like crazy! Everything seemed fine so I just took it out and kept going.

Then I chose some fabric for the back, our duvet cover is brown so I was going for something that would make this a nice little pillow to toss on our bed. I squared up the edges around the hanky and then I laid down the front, right sides facing, to see how big it was and cut a piece for the back.

Then I pinned it together, with the pins waaaaay inside to make sure I didn’t hit one again, and sewed around with a 1/4 inch seam.
In retrospect the hole I left for turning and stuffing seemed a tad too small but I got it. When I went back to my bag of stuffing to grab some more I found this peaking out.

I was so excited, a stuffing tool?! Wow. Was stuffing going to be easier?! Why hadn’t I found one in my last bag of stuffing?! Then I opened it and realised it’s really just a chopstick and I could have gotten one of those from the kitchen. My hands worked just fine.

Stitched the stuffing hole closed and ta da! A cute little pillow to enjoy!

Pocketed pillow, mark it with a C!

More Style School inspiration, well actually the bonus project this time. Decided to make it a gift for my soon to be married friend. Luckily both their last names start with a C so the pillow works now and after the happy day!

pocketed pillow

I used Leaves Vine Stripe, from the Apple fabric by Alice Kennedy.  It’s available from Timeless Treasures.   Or, be like me and get yours on Etsy.  The back panel and the pocket are just dark chocolately brown cotton fabric.  I got the doily from the thrift store and I had the cute little button kicking around.