Category Archives: DIY

Etsy Made In Canada

13612242_10153626818476232_7540274859797262306_n

Excited to be part of this tomorrow! I’m going to be running a workshop showing people how to use up all the itty bitty fabric scraps they have by making 1 inch magnets and hairclips.

img_3269

While the magnets involve a bit of equipment, available at Critical Buttons for rent of purchase if you’re up to making the investment.  The hairclips are much simpler.

hairclips

I get my hairclip supplies from Etsy, this shop has many of the items but I’ve found that buying the pins themselves is the most cost effective from here.

As of right now the workshop is full and I’m looking forward to unleashing my 7 large ziplock bags of scraps onto some participants to help them create some fun items to take home.

I think running this workshop might become a regular thing.

Frame redo, with Instagrams.

This was on my living room wall.  A picture taken of a friend of my son’s toes with a dandelion, a personalized birthday gift from my bf and a saying I cut out of map pieces a few years ago when I was going through some rough times.

IMG_3164

I decided to change up the rough times picture as I feel far more settled and happy now.  I have had these printed Instagram images lying around in a pile for a while, I figured I’d finally put them to good use.

IMG_3165

The frame is a Ribba from IKEA.

IMG_3166

I picked my favs and laid them out in a way I liked.

IMG_3167

Then ta da! New happier wall art!

IMG_3169

Had a hard time getting a non glarey picture but you get the gist.


Save

My hair journey.

In June 2012 I dyed my hair all funky with loads of purple.

This was the image that inspired it, my hair has a ring of dark underneath as well, it’s just not as visible. It helps break up the bangs a bit with some darker strands and also helps when roots start growing in.

Image shamelessly stolen from somewhere during a Google search. I apologize.

I took my purple hair to school on the very last day and was asking if it was a wig, some kids tugged on it but overall it was pretty fun and no one seemed to mind. I had an appointment for the end of August to have it put back ‘to normal’ but as the summer went on I really liked it. Crazy funky hair is a bit tricky, espeically if you pay for it at the salon. The bleaching and colour and all that was $140.

I touched it up here and there myself with Splat, their shade of purple matched better than Manic Panic‘s did. I’ve also been to the salon for the whole root touch up bleaching thing again. Unless you do it all at home yourself funky hair can get pretty expensive. If you’re going to live a little and try it all at home Kaylah and Elycia are the experts.

So this summer I let my hair just go a bit, I didn’t baby it. In a backyard pool I dunked under and swam across, at public swimming I let the kids splash me, I didn’t wear a hat, I went out in the sun . . .basically I enjoyed summer! My purple faded to a truly outrageous pink. Since I have an appt at the end of August at the salon I took the opportunity to play a bit. I picked up some Atomic Turqoise and had some fun.

It took 3 tries, I wasn’t pulling up enough hair for the blue ring at the front. I was being hesitant and dind’t want to mess up my purple entirely. Once the blue was nice and deep and as good as I was going to get it I realised just how faded the purple was. So for $14.99 I fixed it too.

It’s fun wavy or curly but it works best straightened I think.

It’s hard to catch in a picture that I’m taking myself but hey there it is. So I’m living a little before the 31st when I do . . . something else to my hair. I still haven’t decided but I’m getting and gathering ideas here.

Recycled candle making DIY

I made candles! Candles from all my old odds and ends of other candles.

I collect the bits and pieces for a while. You can pick up wicks and the little holdy things for them at craft stores. I had some around because I made candles for people for Christmas gifts years and years ago.

The easiest ones to use are the waxed ones that stand up on their own but you can buy string like wicks and you just have to tie them to some something to keep them straight up.

I have a special metal jug/pot thing from Michael’s for melting the wax but you could just dedicate a pot to it. I did do it inside a pot of boiling water, I think the wax *could* catch fire if you were neglectful but you need to be right at the stove for this. Melt all the bits and pieces and then fish out any garbage.

Then you just pour the new melted wax into the containers and molds. I added some colouring things I had and some stuff that makes the wax smell good too, again I got those at the craft store.

As the wax cools it sort of dips down a little bit so you can leave it like that or I went back and just topped up each candle.

Once they’re cooled you can just pull them out if you made votives or leave them where they are if you re-used previous candle containers.

Body Scrub making.

I have been really intrigued with making my own scrubs recently. I’ve started a collection of ideas on Pinterest on this board. Pardon my hair and eye make up pins.

The recipe I used was
– 3 cups sugar
– 1 cup oil
– 10 drops essential oil

Now I played with this a bit and only made a half batch to try it out. I used vegetable oil, which was what I had on hand and seemed weird but honestly it totally works. I’m going to pick up some baby oil or coconut or something that doens’t make me feel like I should be roasting myself!

I put waaaayyy more than 10 drops of the tangerine oil, I probably put closer to 30. That said, I didn’t find that it made the rub smell as much as I would have liked. I’m going to play around with adding actual orange juice? concentrate? extract? I dunno something to give it that kick of smell. I also put a drop or two of red food colouring in just to give it a hint of colour.

Has anyone tried making their own scrubs? I’d love to hear what works and what doesn’t.

Also, if you give these scrubs a try be careful in the shower because it can make things a touch slippy!

If you’re looking to buy some great natural body products my lovely friend Michelle makes some great stuff. I’m addicted to this Lemon Poppyseed body scrub, I love how it feels and that after the shower I smell a touch lemony.

Whoops.

So I finally got to a project I’ve been meaning to get to, revamping my dresser!

I jazzed it up with some of my vintage contact paper.

But I ran into a problem.

I ran out of contact paper. I have enough to do one more drawer.

Sooo I went with this design. I might find something to cover the empty drawers, perhaps a solid green, but for now I’ll just leave them. It doesn’t look too silly . . . right? con

Easy Peasy Necklace organization

I finally got around to making this little fellow for my growing accessories collection.

I picked up the plaque at Michael’s, it’s just one of those plain wood ones. Then I screwed in some hooks here and there, painted it a fun colour and stapled some baker’s twine to the back!

Nail in wall and voila!

Blurb Instagram book.

When I went to Blissdom Canada I was given a coupon from Blurb and used it literally, in the last few hours before the coupon expired. Since I had only the time I was willing to stay awake that night I made a quick Instagram Photo Book.

It was super easy. You just connect with your Instagram stream and pick and choose the photos you want in your book. You can mess around with the order, choose the cover, it’s all pretty awesome.

Then at check out you can easily choose to duplicate the book, for a gift or such.

Right now, until February 14th there’s a coupon code to save 20% off your photo book, use code MYBOOKLOVE. After making my book and loving it so much I applied to the affiliate program, so fyi these links are affiliate links.

Happy Halloween!

Hope you had a fantastic Halloween. I couldn’t find my modified prom dress that goes with my Tooth Fairy costume so I whipped up a cute plush tooth instead (complete with Mollie-eqsue face) . . . but I know it’s here somewhere.

I had a great day at school, considering it was Halloween. Sadly, with it being on a Wednesday we’ve still got 2 days left to see how crazy it’s really going to get.

My classroom runs on it’s own little time table because I teach a small special education class so I don’t see much of the school, we have our own kitchen, bathroom and we use the fenced in Kindergarten yard for recess but today I happened to catch a glimpse of the gym teacher and I’m so glad I did. Best. Costume. Ever!

We were so busy at home this evening I didn’t even snap a pic of the kids! Wow, mom fail.

DIY Panda drawer sachets

While shopping at a farmer’s market the other weekend I picked up some lavender and got a neat idea for these sachets for my drawers. They’re really quick and easy and can help destash your scrap bin, something I love to do. I’m making a run for the border today and so in lieu of a Create Along post (too busy with back to school) I thought I’d share this instead.

So you will need the following supplies, along with a needle, on a machine or for your hand.

The fabric pieces can be any measurement you want, they just need to end up a square. I made 2 and one is slightly smaller than the other but they’re around 3 1/2 inches square. You need to make 2 quilted pieces that measure wide enough for your front piece and then have some extra because they will overlap and make an envelope pillow cover sort of closing.

You’ll need white and black embroidery floss, some black fabric for eyes and ears and I used some scraps from my cup cozies as lining for the ears.

Panda making

1. Place the eyes on the pretty scrap (sew them on with black thread or iron on with a fusible thing)
2. Embroider the features on the panda, white eyes, and a black nose and mouth.
3. Layer the ear pieces – black, black and then lining. Sew around the curved part of the ears and then turn right side out.
4. Quilt together the backing pieces from scraps, hem the edge where the opening will be.
5. Put the quilted pieces on your work surface right side up, make sure the hemmed parts where the opening will be overlap by at least 1/2 inch.
6. Lay the ears down with the straight edge lined up with the top of the quilted pieces.
7. Place the panda face pretty piece face down on top of the pile. Make sure the ears are sandwiched in.
8. Pin to hold everything in place.
9. Stitch around the entire square.

Sachet making

1. Get your scraps and lay one on top of the other. I use the screenprinted bits that got messed up and I can’t turn into cup cozies.
2. Stitch around the square leaving an opening on one side, about an inch wide.
3. Stuff your sachet with something pretty smelling (potpourri, lavender, etc)
4. stitch the opening closed.
5. Trim around the square, be careful not to cut into your stitches.

The great thing about making the panda with an envelope closure is you can swap out the inner sachet when the smell fades or to change things up a bit. I’d love to see what you make!

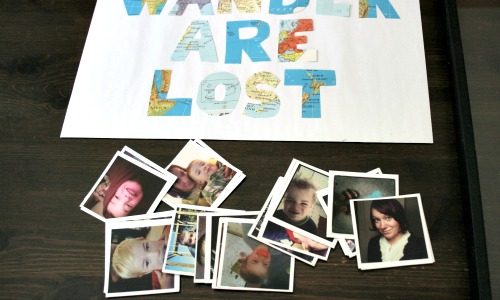
Also, I’ve been dying to use handwriting on my photos and haven’t been happy with the results/methods. But today I figured I’d give it a try and not be so picky. Elsie‘s post sabout apps and techniques helped guide me in my quest.