Category Archives: DIY

Dining/drawing table

I spontaneously had this idea a few weeks ago and luckily it was followed by a trip to IKEA. I had great photos of all of this, as well as our kitchen floor remodel, but then our camera’s card pooped out on me and I lost them. So here’s my re-enactment. Our table is from the ASIS aisle, so excuse all the writing they put on it.

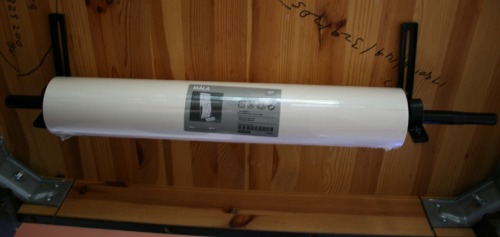
I went to IKEA and bought this roll of paper, a curtain rod and the hardware to hang the rod. I mounted it under our table. It was a super inexpensive project that’s definitely paid for itself in time spent drawing, colouring and painting. The paper just rolls up onto the table top.

And the kids can colour, make roads, write about food, tell me who’s sitting where . . . . the list goes on.

I am no HTML expert, honest

Well I did a bunch of work tidying up my blog layout and some pages over the weekend but I also broke a whole bunch too. Luckily I have one of those computer programmer husband things so he was able to come to my rescue.

I now have all my DIY projects in a nice fun table on the DIY page.

I’ve got all the Create Along projects listed as well on the Create Along page.

I also made my social media icons smaller and much more subtle, they were bright crazy colours before. They were the colours from my blog palette but still too bright. If you want to find me I’m sure you can figure it out, they don’t have to hit you over the head.

I also wanted to take a moment to just say thanks for reading my blog. It’s coming up on 4 years of this wonderful thing and it’s been so much fun. What started as a personal journal of creativity for my eyes only has grown into so much more and I’m so happy that I can continue with it and that others are sharing in my fun.

SewTara in Hamilton.

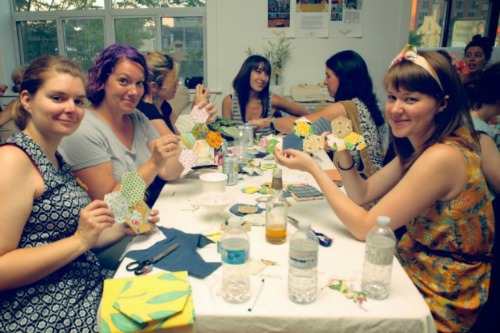
Well, it appears I’m a bit addicted to attending any Etsy event I can. Since I’ve hopped the borer twice it didn’t seem like such a big deal to head down to Hamilton for a meet up. This time it was a joint effort between Etsy and The Beehive Collective. I also sent a Tweet to Elycia since Hamilton is her town and asked what I should check out while I was puttering around downtown Hamilton in the scorching heat. I’m glad she had ideas because I found White Elephant and Needlework.

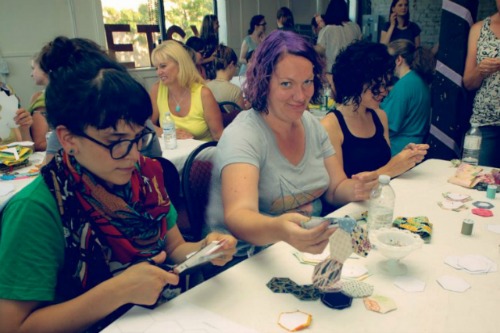
The lovely ladies behind the collective are gearing up for Supercrawl and a huge art instalation piece. Last year they covered a building in knitted ‘bricks’. This year they plan on covering buildings for a block or so with fabric hexies. We all met up and spent a night whipping up some hexies for the instalation.

If you’d like to help you can download templates here and here and drop them off at a list of places in Hamilton or Toronto or I’m sure you could contact The Beehive and find a way to send your contributions over.

See all the photos in the EtsyCA album.

DIY Spring door decor

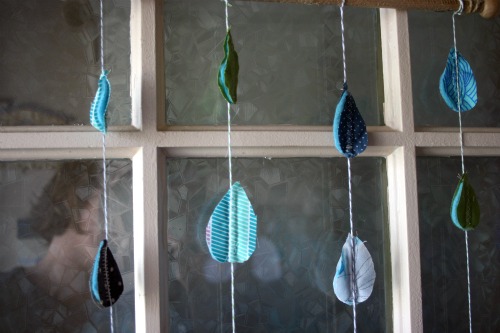
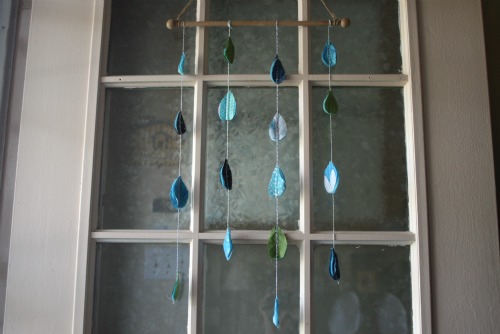
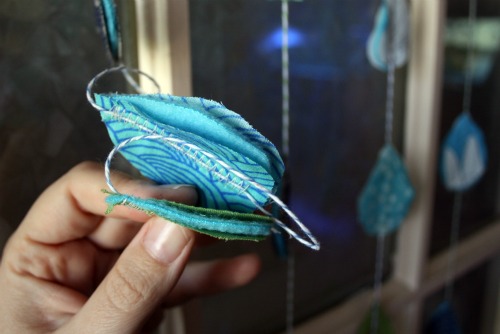
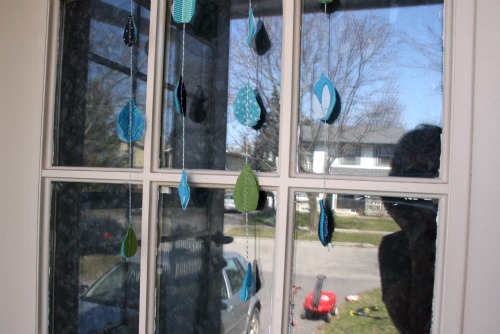
I took our little snowman decoration down a while back, since we had a pathetic amount of snow this year, and realized over the weekend our door looked bare. Thinking of spring I put together this cute scrappy little door decor.

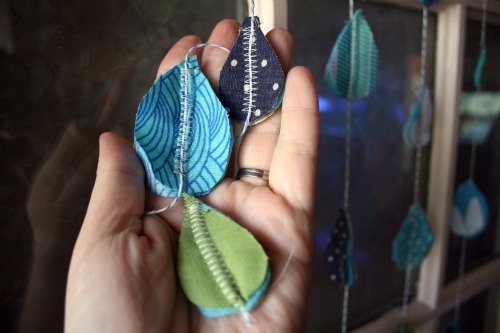
I gathered up some fabric scraps, fleece scraps, and some baker’s twine. I reused the dowel hangy thing from a pennant someone had made me year’s ago for my classroom door. It had my maiden name on it so I cut it off and kept the wood bit around knowing I’d find a way to use it.

I chose cool coloured fabrics and made sure the fleece was blue as well. I wanted it to look a little unfinished at times. I cut 2 pieces of fabric for each raindrop and 1 piece of fleece. Sandwiched them together and zig zag stitched the baker’s twine in place on each raindrop with my sewing machine.

It’s really pretty hanging on the door and it’s fun when the wind gently blows the raindrops around a bit.

DIY kitty toy

I shared this post last week on Meremade and in case you have a feline friend in your house and missed the post over there I thought I’d share it here.

With loads of crafty supplies and some cats in the house I thought up this fun DIY craft that the feline in your life will appreciate. This project can be hand-stitched or made with a sewing machine. It’s also very scrap friendly and you should be able to find all these supplies in your crafty cupboard.

You’ll need:
– fabric scraps
– ribbon (cut in 4 pieces, one 6 inch and 3 3 inch pieces)
– stuffing (polyfill or scraps cut up really tiny)
optional
– 2 buttons
– catnip

First cut out a head and tail shape from your scrap. Sew around leaving a small opening for stuffing.

I cut up a small scrap of flannel into tiny squares to act as filling. Stuff the head with filling and add your catnip. Tuck one end of the long ribbon piece into the opening and securely attach it with hand stitches or using your zig zag stitch.

Sew the tail piece leaving a small hole for stuffing. Stuff it and attach the ribbon just like you did for the head.

Tie the smaller pieces of ribbon to the fish ‘body’ so they look like little bones.

Sew the buttons on the head for little x’ed out dead eyes.

Ta Da! All finished. Now toss the toy to your favourite kitty and sit back to enjoy the silliness.

DIY with loads of sharing

You will need:

Some fabric scraps
Modge Podge
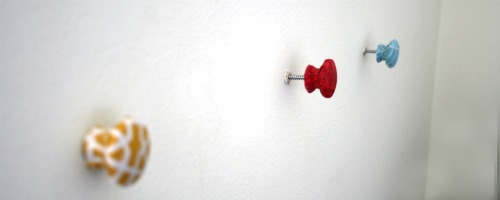
Knobs (screw pieces if they don’t have them)
Wall anchors

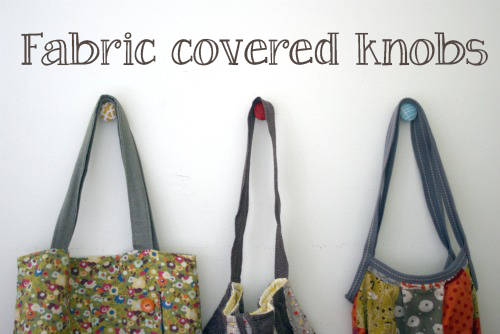
Cut a scrap of fabric and wrap it around the knob to cover it. Pour Modge Podge on the front and smooth it down saturating the fabric and gluing it to the knob.

You can secure it with an elastic to help it dry in place. Once it’s dry trim away the excess fabric.

The knobs I bought didn’t have screws on the end so I had to glue some in.  If you’re repurposing cabinet handles you may not have to do that step.  I choose 3 colours that would compliment my handmade art wall.

Decide on your spacing and drill holes in the wall.  Secure the anchors and make sure they are flush with the wall.  Then simply screw in the knobs.

The next step is the best, hang your accessories!

I used mine to display my growing tote/purse collection. Bags are from (left to right)
Kimmy Kingsbury, Hot Butter, and me!

I’ll be sharing the love this week

I have a bunch of things photographed and tons of posts to write. I decided to share some thing by sharing some link love this week. So the next 5 days will be spent doing just that.

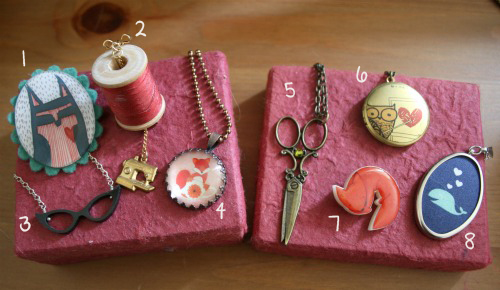
To kick it all off here’s a glimpse at some of the great accessories I’ve been accumulating recently. I’ve suddenly fallen in love with brooches and pendants and I’ve acquired a nice collection.

I made these 2, I’m particularly proud of the deer one. I bought a clearance pendant and yanked out the middle, the I cut a fun piece of fabric to fit inside. I glued it down with some Modge Podge, this seems to seal the fabric a bit, then I poured Dimensional Magic on top. DM is finicky, one moment it’s all nice and air bubble free, the next moment you look back and it’s like ninja bubbles have appeared. I tend to pour it in when I know I’m going to be sitting right there crafting so I can watch it. I seem to have about an 80% success rate with which pendants turn out, I’m happy this one worked out so beautifully.
The owl was a no brainer, I picked up all the pieces at Michael’s and just put it all together.

1. Garlic Paws from Denture Thief
2. Handmade gift from Amy
3. Cat eye glasses necklace by Isette
4. The Fox and the Tea Cup by Stephanie
5. In person at a craft sale, can’t find their Etsy shop right now
6. Mint Designs
7. Birthday gift from Tabatha bought from Beauty Spot.
8. Yellow Heart Art

DIY – Tomato pin cushion revamp

I’ve made a bunch of scrappy pin cushions since I started sewing and one thing I recently learned is you shouldn’t fill them with that polyfil stuff, apparently it can dull your pins and needles. I had no clue.

Some emery sand would be best, but it’s tricky to find. And while the nostalgic red tomato pin cushion reminds me of my mom sewing, everyone has one and having something different is fun. So I decided to start with the standard tomato pin cushion and do some reworking.

You’ll need:
tomato pin cushion (I already removed everything off it before the photo)
fabric square big enough to wrap it up
a scrap of fabic
embroidery floss
optional: ribbon or rick rack and some buttons

Figure out how your square of fabric will best fit on the tomato and start attaching it with little stitches around the top.

It should look something like this, with more or less fabric depending on the piece you started with.

Trim the excess, try to get it as close as possible to the stitches.

Thread some embroidery thread onto your needle and starting at the top travel around the tomato pulling tightly to secure the fabric. You can cross over and under the threads to help them stay in place.

Cut some sort of fun shape to cover all your stitching at the top. I went with the leaves on the tomato sort of shape out of a fun polka dot print.

Stitch around the secure the scrap to the top your the cushion. Try to pop up as close to the middle as possible and then attach a bit of ribbon or rick rack. I decorated the end of mine with buttons stitched on back to back.

And ta da! A lovely revamped pin cushion.

Glad I bought it!

I certainly don’t need another craft book, but I’m sure glad I picked this one up.

It’s by Sue Kim and I didn’t even connect that she’s the lady behind I Think Sew, and I certainly didn’t know she lives in Toronto just minutes from me!

See all those cute stickies flagging pages? Yeah, I want to make all those. I’ve got a bag problem . . and a sewing problem . . . *sigh*

I also picked up this one to add to my collection of fabric printing books. Hopefully I’ll get to spend some time reading them someday. I’m dying to get into making my own fabrics.

Friday Create Along

Here are some reveals.

Wipe container letters and numbers? Ta da!

Lavender sachets? Ta da!

Crocheted slippers? . . . pass for now.

Up next this cute little phone pouch pattern available from Nap Kitten. I assure you this pattern is much easier than her wallet, ailment which kicked off this Create Along adventure.